
Friday CRM can both import companies and their related persons and upload contact lists of individuals.
These features are activated in the Settings -> Import contracts section.

Import of companies
Step 1. Preparing the import file
The system supports the following formats
- XLS (encoding selection is not required)
- XLSX (to increase upload speed while importing more than 5,000 lines, it is recommended to use the XLS format)
- CSV (when uploading this file type, it is recommended to select appropriate encoding in the import settings)

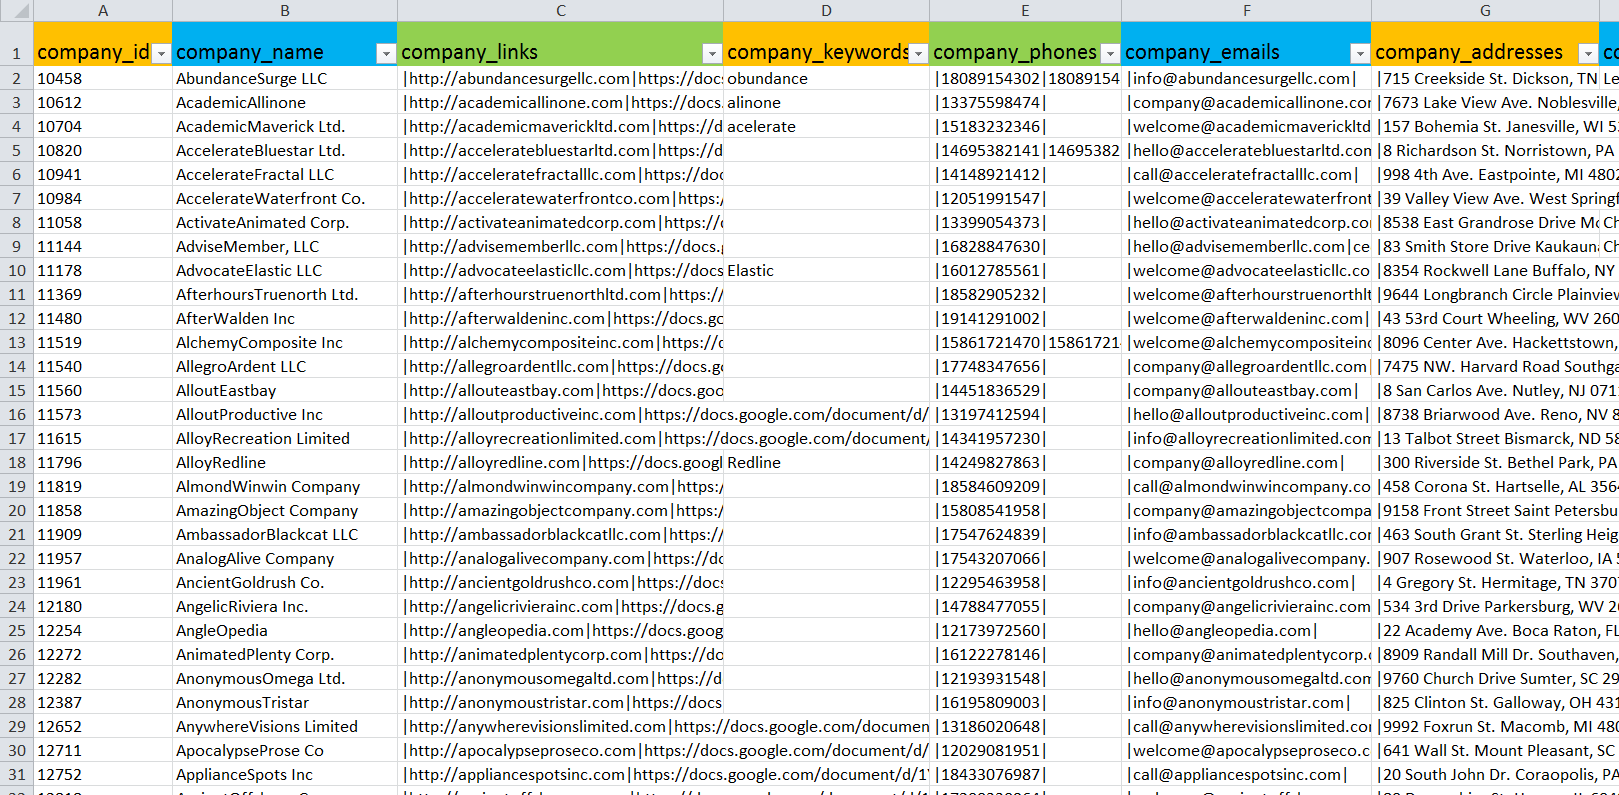
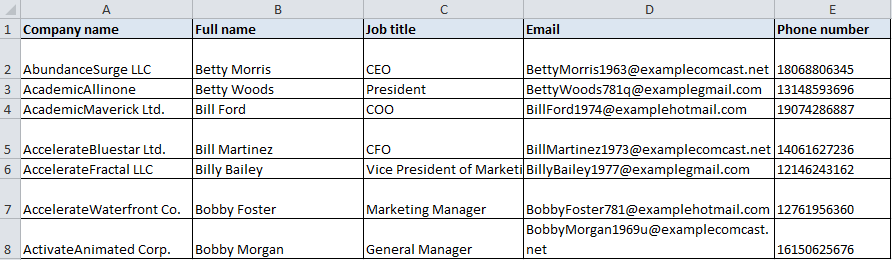
When generating the import file, it is first necessary to decide its structure.
Document may contain the following fields:
- company name
- company tags
- keywords (ex. legal name)
- phone numbers (without unnecessary characters or gaps, 17861231234)
- weblinks (website, any online documents)
- addresses (ex. office, billing, shipping)
- person responsible for company (curator)
- system ID (numeric)
Not sure how to get started?
2. Download as XLSX file (File->Download)
3. Then edit and upload the file
Not all of them are mandatory.
For example, the file can include only one actual address, and keywords for organization can be simply omitted.
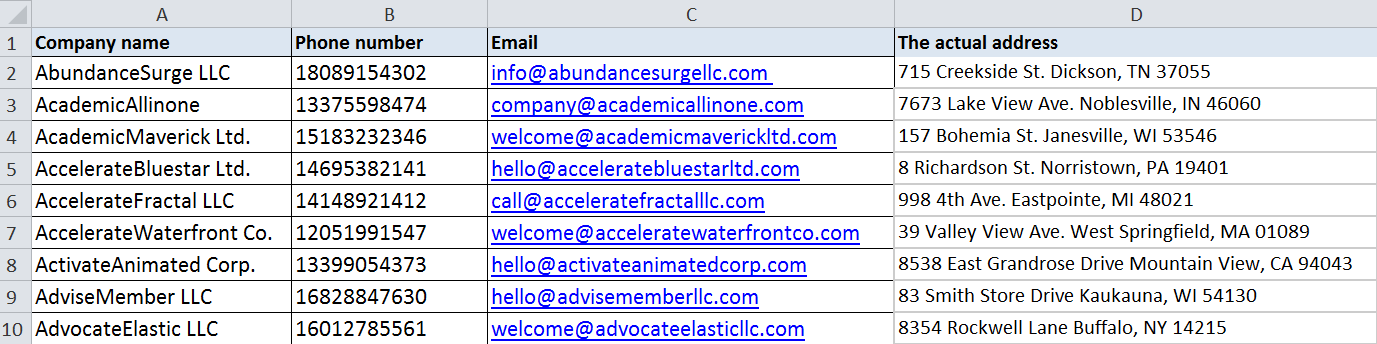
The company name and contact number are mandatory fields, without which a working import file cannot be generated.
The prepared file is saved in one of the formats supported by the system: CSV, XLS or XLSX.
Step 2. Importing a file
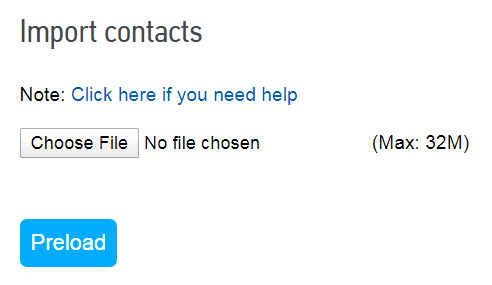
To import an already generated database to the CRM it is necessary to:
- access from the Settings -> Import contacts
- select the required file (supported formats: CSV, XLS, XLSX)
- click the Preload button.

Step 3. Distributing data for import
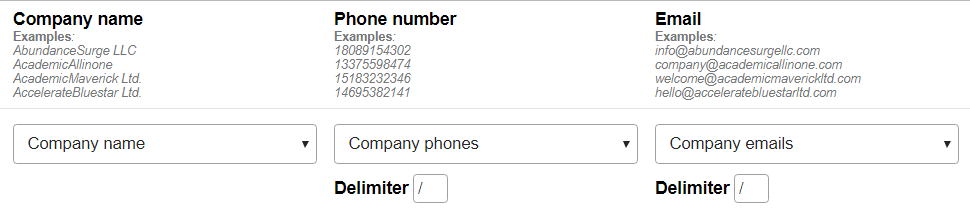
Before proceeding with the file import, it is necessary to confirm that the data matches the columns of the uploaded file and to specify the structure.
A. Select the name of every field from the drop-down list: Company name, Tag, Company phone, etc.
B. Indicate delimiter used in the file when multiple values are available, e.g., several addresses of the same company: “/” or “;”
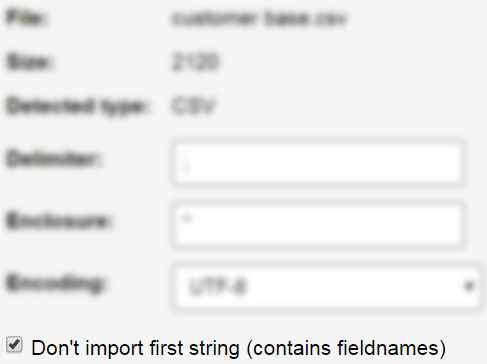
C. Indicate character separating one field from another, e.g., ^ or ; (relevant for CSV files)
D. When uploading the CSV format file select appropriate text encoding

E. Click the checkmark box it is necessary to import the first string with fieldnames
F. Create a unified tag for all the companies of this import for quick search in contacts

G. Save import settings (optional)
Step 4. Beginning import

After import
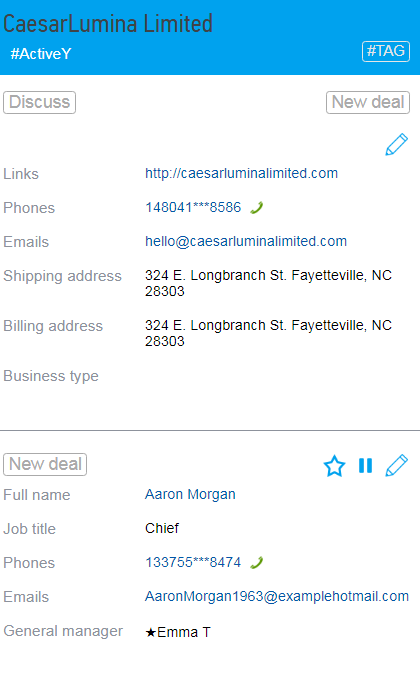
The Company profile will contain all uploaded information about the company.
Upon completion of uploading, imported data can be easily found in the Contacts by typing a corresponding tag.

Import of persons
Step 1. Preparing the import file
Uploading of person base begins with preparing the import file (supported formats CSV, XLS and XLSX).
File may contain the following fields:
- Company name (with which the person is associated)
- Full name of person
- Preferred name
- Job title
- Phone numbers
- Features
- Birthday
- Tags
- Curator
- System ID (numeric)
Name and phone number are In order to reference a manager’s actions with a certain type of activity (call, making cost estimates, conducting presentation, etc.), note tags are used.
fields. In order to link a person to the company, it is necessary to indicate company name in the file.
Important: for proper interlinking of an organization with its employees, the base of persons should contain the same organization name as in the base of companies: without any discrepancies, reductions, etc.
For example, it is inappropriate to write the name “Toy World on 1st Street” in the companies import file and simply “Toy World” in the persons import file. In this case linking of the company with person will be performed improperly.
Step 2. Importing file
Upon generation of the file, it is preloaded to Friday CRM with further settings for the import process:
Step 3. Distributing data for import
1. Select the name of every field from the drop-down list: name, job title, phone, etc.
2. For the Company Name field, select the Link person to company name option (when it is necessary to link the imported persons with corresponding organizations)

3. Indicate import tag

4. Save settings (optional)
Step 4. Beginning import

As a result, the person’s details will be displayed in the company profile to which it is linked as well as in the separate profile of the person.
The import option provides an opportunity to transfer existing databases to the CRM just in a few steps without losing time and to automate the process of working with them.
The base is imported to the system, almost always, within a short period of time. When quite large-scale bases with thousands of items are being uploaded, it may take longer. Duration of the import, in this case, will be displayed on the screen.